Post by Pandora Relenta on Mar 28, 2012 19:48:02 GMT -5
Hey, DotD.
So, a few things. Today we'll be making THIS. Yes, I know it isn't very good, but I whipped it up in a few minutes so it'll have to do. I made this on Adobe Photoshop Elements Ten, but since it's such an easy avi to make, feel free to use any other photo editing software to make it.
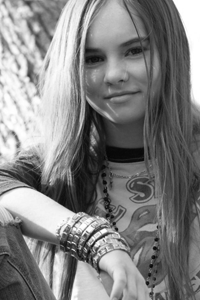
For this tutorial you only need one pic! It's Jennifer Lawrence!
HERE is your picture!
This tutorial is a very go-your-own-way. I'm letting you pick a lot of the detail. So, if you don't know how to open a new file, go to File>New>Blank File. Then it asks you about the size. I went for 200x300 and suggest that you do the same. After filling in the spot for the size, click "OK". Now you have a black canvas. You take out a sky blue color and click your paintbucket tool -- this was a good color since it matches Jennifer quite nicely. Click the empty canvas and voila! Filled with blue!
This step is super simple. Copy the photo of Jennifer Lawrence that I gave you. To paste, go to Edit>Paste. Now you've just got a whole blob of Jennifer. Click her, and move her over to the left so that her hair brushes the left corner, and part of her left shoulder shows. But you can't see the blue! Don't panic! That's in the next sentence. Now you've gotta go over to the opacity, and bring Jennifer down to 92% opacity. She should be a bit faded.
Next, create a new layer. (Layer>New). Do the same paintbucket effect WITH THE SAME COLOR BLUE AS BEFORE!! Go to the little effect bar next to your opacity-change-thing. Select "screen" and bring it down to 42% opacity.
Now you're almost done! Just the text! Go to your text tool and scroll down the bar of texts. You should already have the text I used "Harrington" already downloaded. Make sure that the text is black. The size doesn't matter 'cause we'll size it down later. First, on a new layer, write the first line of your text. I did "Think you can take me on?" After it's written, select that layer, and resize it to be as small as you please. MAKE SURE THAT IT'S IN BOLD! ALL TEXT WILL BE BOLDED!!! you repeat that with all the lines. Save it to .jpeg and upload it. Now you have your very own avi!
So, a few things. Today we'll be making THIS. Yes, I know it isn't very good, but I whipped it up in a few minutes so it'll have to do. I made this on Adobe Photoshop Elements Ten, but since it's such an easy avi to make, feel free to use any other photo editing software to make it.
For this tutorial you only need one pic! It's Jennifer Lawrence!
HERE is your picture!
STEP ONE !!
This tutorial is a very go-your-own-way. I'm letting you pick a lot of the detail. So, if you don't know how to open a new file, go to File>New>Blank File. Then it asks you about the size. I went for 200x300 and suggest that you do the same. After filling in the spot for the size, click "OK". Now you have a black canvas. You take out a sky blue color and click your paintbucket tool -- this was a good color since it matches Jennifer quite nicely. Click the empty canvas and voila! Filled with blue!
STEP TWO !!
This step is super simple. Copy the photo of Jennifer Lawrence that I gave you. To paste, go to Edit>Paste. Now you've just got a whole blob of Jennifer. Click her, and move her over to the left so that her hair brushes the left corner, and part of her left shoulder shows. But you can't see the blue! Don't panic! That's in the next sentence. Now you've gotta go over to the opacity, and bring Jennifer down to 92% opacity. She should be a bit faded.
STEP THREE !!
Next, create a new layer. (Layer>New). Do the same paintbucket effect WITH THE SAME COLOR BLUE AS BEFORE!! Go to the little effect bar next to your opacity-change-thing. Select "screen" and bring it down to 42% opacity.
STEP FOUR !!
Now you're almost done! Just the text! Go to your text tool and scroll down the bar of texts. You should already have the text I used "Harrington" already downloaded. Make sure that the text is black. The size doesn't matter 'cause we'll size it down later. First, on a new layer, write the first line of your text. I did "Think you can take me on?" After it's written, select that layer, and resize it to be as small as you please. MAKE SURE THAT IT'S IN BOLD! ALL TEXT WILL BE BOLDED!!! you repeat that with all the lines. Save it to .jpeg and upload it. Now you have your very own avi!
POST THE FINISHED AVATARS IN A REPLY TO THIS THREAD! IF YOU HAVE ANY OTHER QUESTIONS ABOUT THE TUT PM ME ON PANDORA RELENTA'S ACCOUNT!


